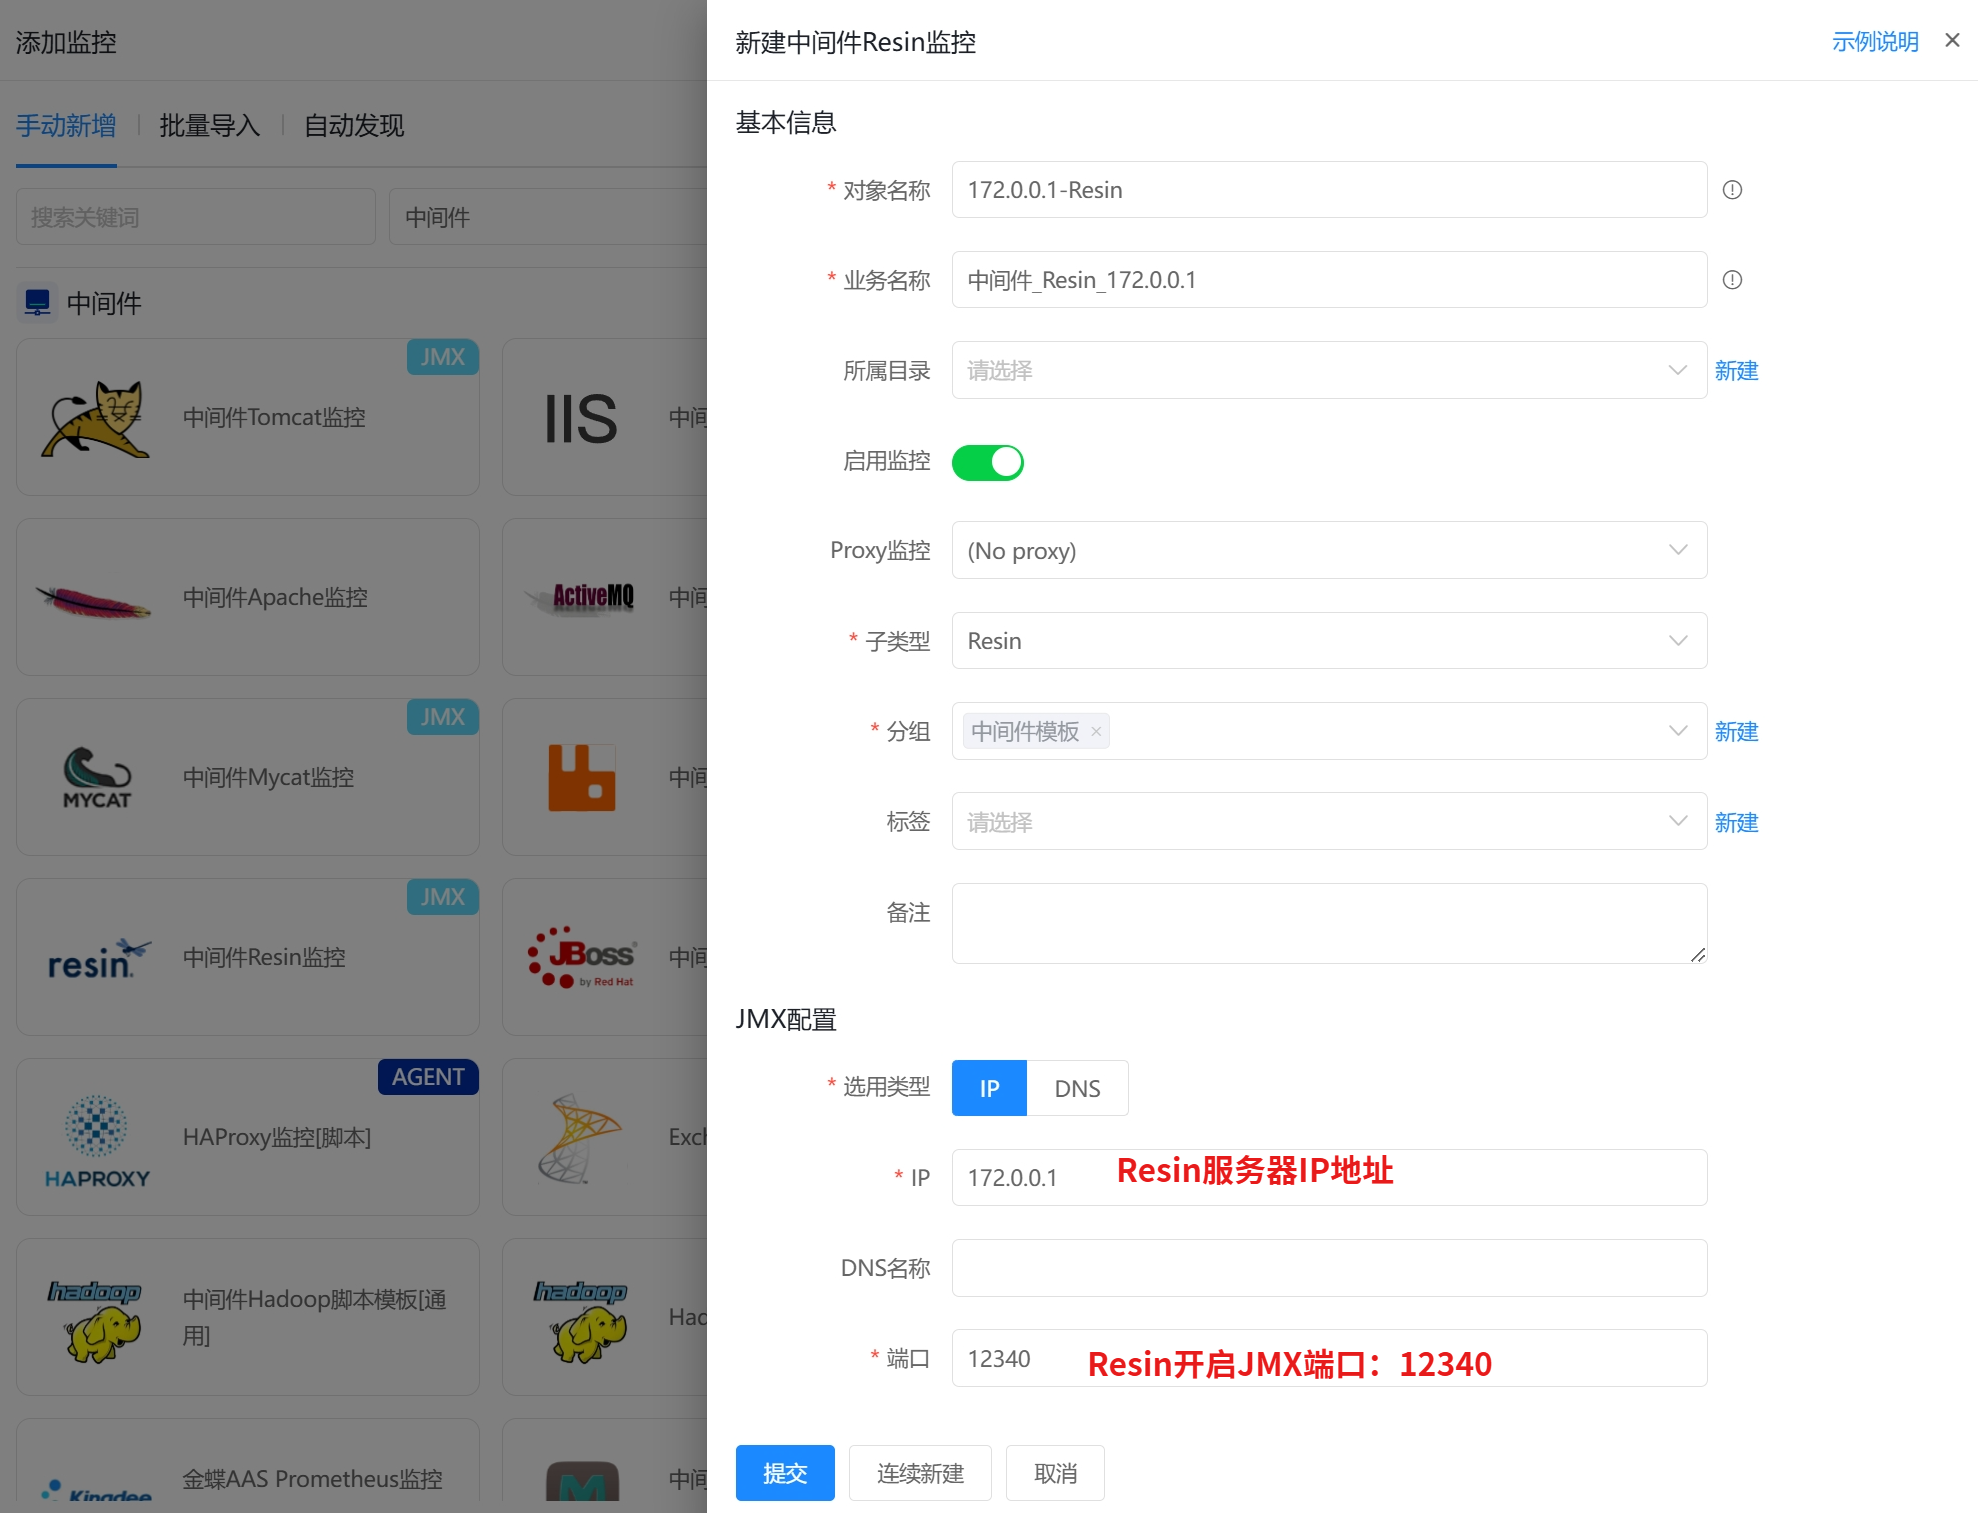
中间件Resin监控
模板ID: 10593 | 模板标识: LW_Template Resin JMX General
帮助说明
linux 配置
1. Resin4 开启JMX服务
路径 :/usr/local/resin4/bin/resin.sh ,修改resin/bin目录下的resin.sh 。(路径已实际情况为准)
vim resin.sh #一下代码添加到最后一行 。
ENV=" -Dcom.sun.management.jmxremote -Djava.rmi.server.hostname=172.0.0.1 -Dcom.sun.management.jmxremote.port=12340 -Dcom.sun.management.jmxremote.ssl=false -Dcom.sun.management.jmxremote.authenticate=false -Dcom.sun.management.jmxremote.password.file=${RESIN_HOME}/conf/jmxremote.password -Dcom.sun.management.jmxremote.access.file=${RESIN_HOME}/conf/jmxremote.access"
exec $JAVA_EXE -jar ${RESIN_HOME}/lib/resin.jar ${ENV} $*
注释:
-Djava.rmi.server.hostname=192.168.1.245 # 设置resin 注册JMX的IP地址,不设置连接不上,IP地址更具实际情况填写。
-Dcom.sun.management.jmxremote.port=12340 # 设置resin 注册JMX的端口号,这里使用12340为resin注册JMX的端口号。
-Dcom.sun.management.jmxremote.ssl=false # 不支持ssl(ssl配置没成功)。
-Dcom.sun.management.jmxremote.authenticate=false # 关闭远程用户名和密码验证。如需要开启可以设为true,需要配置账号密码。
重启resin服务器,查看端口
ss -lnt | grep 12340

windows配置
路径: C:\Users\lewei\Desktop*resin-4.0.66\conf\resin.xml ,* 修改resin-4.0.66\conf目录下的resin.xml 。(路径已实际情况为准)
在
-Dcom.sun.management.jmxremote -Dcom.sun.management.jmxremote.port=12340 -Dcom.sun.management.jmxremote.ssl=false -Dcom.sun.management.jmxremote.authenticate=false -Djava.rmi.server.hostname=172.0.0.1
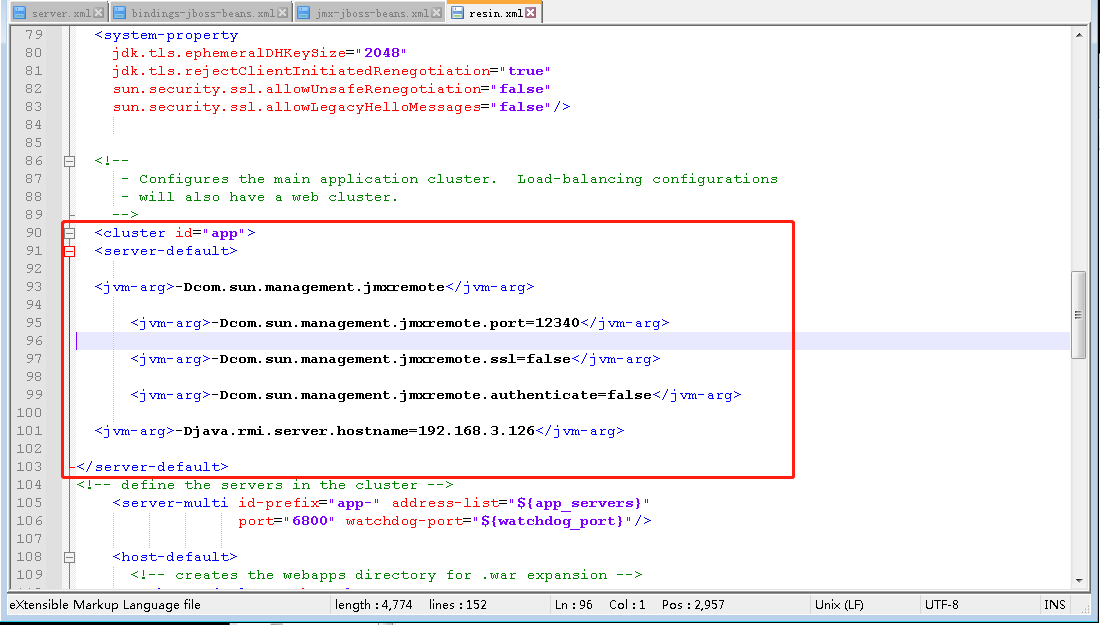
重启服务,查看JMX端口
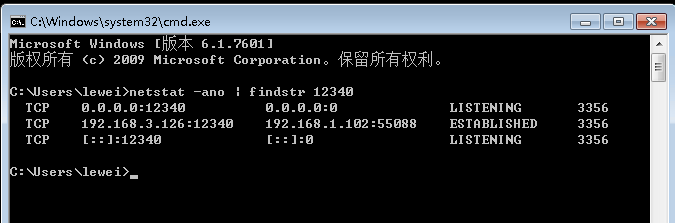
2.监控平台。
路径:监控中心 → 综合监控 → 资源列表 ,选择右上角**新建** 。
填写相关信息。